
Account & Security
How to Complete Binance Identity Verification: Documents, Liveness, Rejections
Complete Binance personal verification by checking region, accepted documents, liveness, review status, and official rejection or appeal paths.
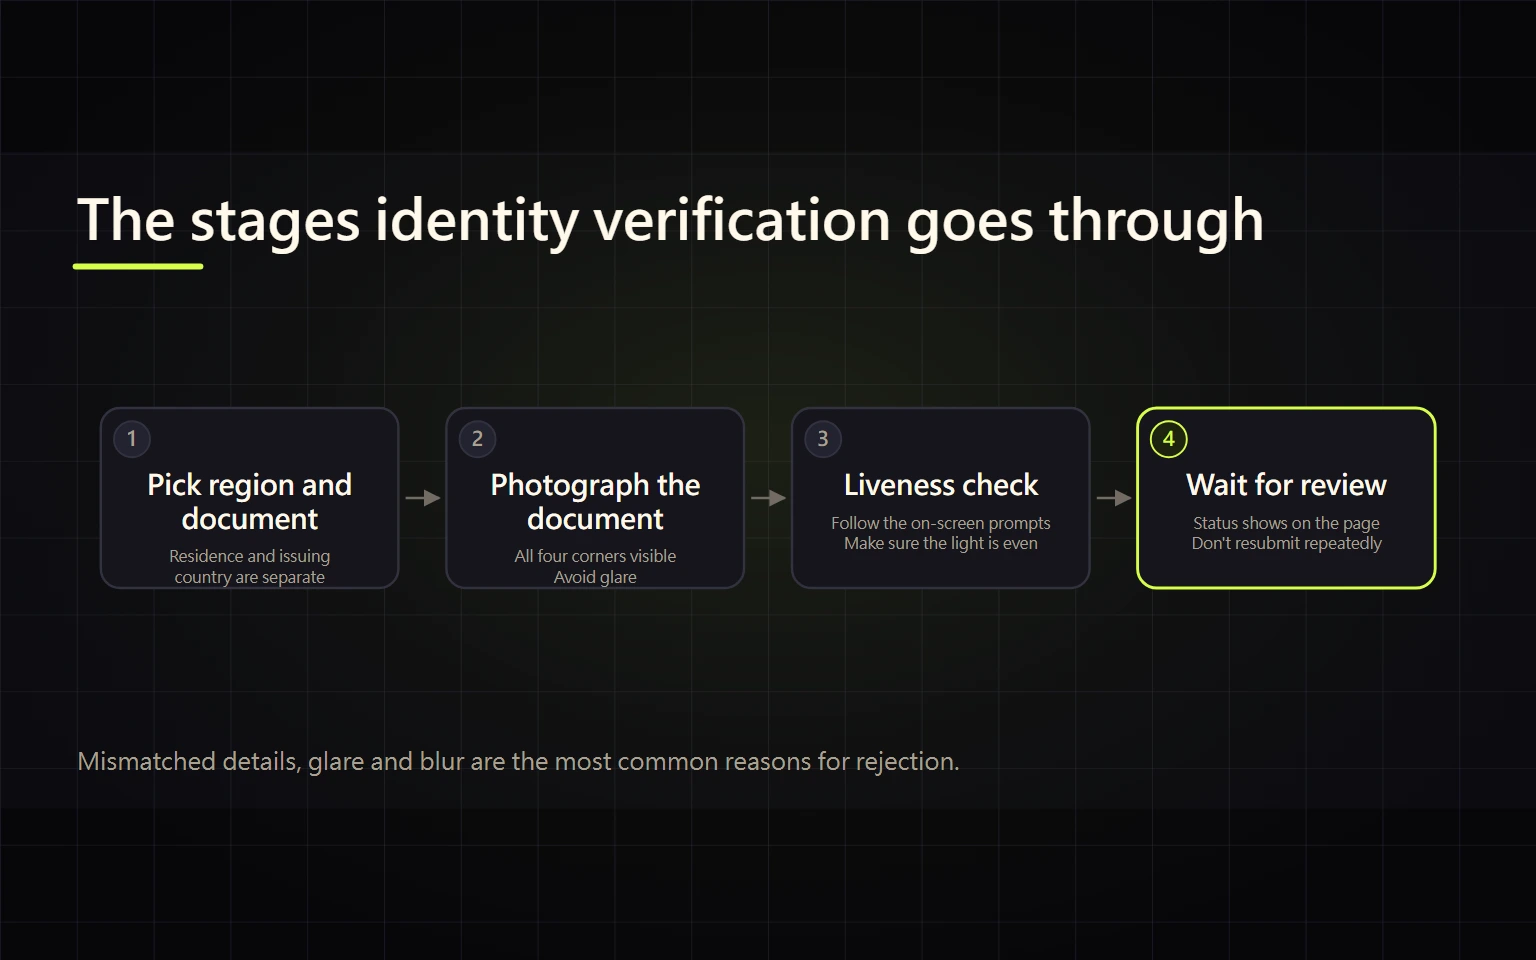
Binance Academy’s KYC explainer covers the purpose of verification; your signed-in Identification page controls the actual document and workflow requirements.
This guide is for an individual who has registered, is preparing to fund an account, or needs to recover from a rejected document or liveness check. The goal is not merely to upload files. It is to reach a Verified state on the Identification page and know what evidence to preserve and which official route to use if the process fails. This site does not collect your ID, selfie, proof of address, or account screenshots.
Contents
- What completion means
- Step 1 Confirm region and account type
- Step 2 Prepare only the documents shown
- Step 3 Start on the website or app
- Step 4 Capture the document and complete liveness
- Step 5 Check extracted data before submission
- How to read the status after submission
- Troubleshooting by visible failure
- Completion checklist
What completion means
Keep these states separate:
| State on screen | Meaning | Next action |
|---|---|---|
| Not submitted | The form or evidence is incomplete | Follow the current screen; do not guess a document |
| Under Review | Binance has received the request but has not approved it | Record the state and time; do not create duplicate attempts |
| Verified | The displayed verification level has passed | Recheck the limits and products actually shown for your account |
Only a Verified state on the Identification page is a completion signal. Verification does not guarantee that every product, funding rail, or limit is available. Region, account risk status, and product eligibility still apply.
Step 1 Confirm region and account type
Open Binance from a bookmark you created from the official site, not from a search ad, direct message, or a stranger's “fast verification” link. Confirm that you are using the Binance platform permitted for your location and that you are verifying a personal account rather than an entity account.
Residence means where you genuinely reside. Document Issuing Country or Region means where the document was issued; they can differ. Report both truthfully. Do not use a VPN, false address, borrowed account, or another person's document to bypass a restriction. If your location is not supported, stop and ask official support what applies instead of changing the answer.
Step 2 Prepare only the documents shown
Read the accepted options on the live page before preparing files. Binance's current public personal-verification guide shows that a passport, identity card, or driver's licence may be offered, but the list is not universal. Manual upload is also country-dependent.
Prepare:
- a valid, unexpired government-issued document that the current screen accepts;
- personal details that correspond to the document, using a language or transliteration the live form supports;
- a phone or computer with a working camera and camera permission; and
- proof of address only if the current workflow explicitly requests it.
Do not edit, filter, crop, or photograph a copy displayed on another screen. Keep all edges, text, portrait, and machine-readable zones visible. Do not store identity files on a public computer or send them through chat to a “support agent.”
Step 3 Start on the website or app
The current official website path is Account → Identification → Get Verified. On the app, use Verify Now from the homepage or Account Center → Unverified. Labels can vary by version and location; if the entry is missing, search Identity Verification in the official Support Center rather than accepting an upload link from social media.
Select Residence, Document Issuing Country or Region, and Document Type in the order shown. Recheck each value before continuing. Convenience is not a reason to select a country or document type that does not match reality.
Step 4 Capture the document and complete liveness
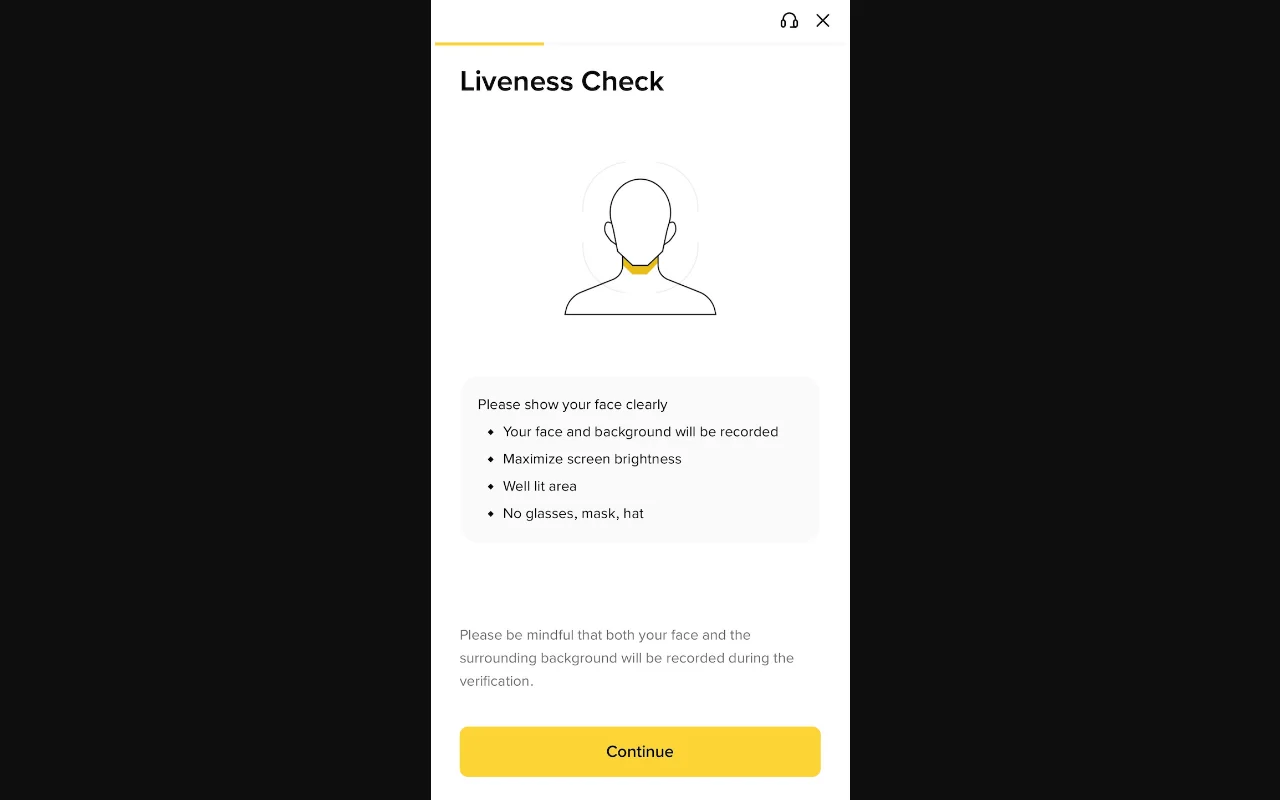
Real interface screenshot from Binance's official personal-verification tutorial. It contains no real face or account data. Your screen may differ by device and region.
Place the original document on a flat surface with even lighting. Avoid glare, shadow, fingers over fields, blur, and missing edges. If both sides are requested, make sure both uploads are accepted before continuing. If the page connects to a phone through a QR code, scan only the code generated by that official session and never post it publicly.
For the liveness check, clean the camera, centre your full face, use a simple background, and follow the live prompts. Binance's tutorial instructs users not to wear hats, glasses, or filters and to use sufficient lighting. Do not switch apps, refresh, or let another person perform the check. If it fails, correct camera permission, lighting, framing, or network stability before trying again; do not run endless rapid attempts.
Step 5 Check extracted data before submission
Optical extraction can be wrong. Compare every field with the original, especially the name fields, date of birth, document number, and issuing region. Binance's current guide warns that the entered information cannot be changed within that flow after confirmation, so go back before submission if anything is incorrect.
A personal account cannot be transferred to someone else, and another person's ID cannot replace yours. If a document expires or your name, nationality, or document number legally changes later, use Update Identity on the Identification page or an official support process; do not create multiple personal accounts to avoid the update.
How to read the status after submission
Save the submission time, current state, and exact error wording without exposing sensitive fields. Binance's guide says submitted documents are usually reviewed within 48 hours, but particular cases may take longer. Treat that as general guidance, not a deadline or guarantee.
While the state is Under Review, avoid refreshing, changing spellings, or opening a duplicate request. When a notification arrives, open Binance from your bookmark and inspect Identification directly rather than trusting an email button. If it says Verified, recheck the displayed level, limits, and the product you actually need.
Troubleshooting by visible failure
The expected document is not offered
Residence, issuing region, or regional platform may produce a different list. Use the live options only. If none fits, tell official support your location and the visible choices, but do not send a complete ID in an ordinary chat.
The document image is rejected
Check expiry, document type, front and back, all edges, glare, blur, and cropping. Retake the original. Do not “enhance” text in an image editor or photograph an image shown on another screen.
Personal details do not match
Compare each field, not just pronunciation. If identity data has legally changed, use Update Identity or official support. Do not guess a spelling, change region, or borrow another person's data to satisfy the form.
The liveness check fails
Verify camera permission, lighting, network stability, lens quality, and an unobstructed face. Follow the visible prompt. If failures continue, record the error and time and use Binance's privacy portal for Failed Facial Verification Appeal or KYC rejection appeal when that option is available to your region, or escalate through official support.
Someone requests off-platform documents or payment
Stop. Verification should occur only on the official Binance website, app, or a service explicitly linked by Binance. No legitimate helper needs your one-time code, remote access, a transfer to a “safe wallet,” or identity files through Telegram, WhatsApp, or a personal inbox.
Completion checklist
- Residence, issuing region, and document type match reality.
- The original document is clear, complete, unedited, and accepted by the live screen.
- You performed the liveness check yourself and reviewed every extracted field.
- The request reached Under Review; final completion is Verified on Identification.
- A failure is handled through an official appeal or support route, not repeated submissions or location workarounds.
- After verification, you checked the actual limits and product availability instead of assuming all features opened.
Next, complete the Binance account security checklist and follow the beginner roadmap before a small funding test.
Official sources and verification date
- Binance personal account identity-verification guide
- Binance Academy KYC explainer
- Binance Privacy Portal
- Binance Privacy Notice
This article was checked against public official pages on 2026-08-27. Buttons, documents, timeframes, verification levels, and product access vary by region, account, and system state. Follow the signed-in screen. This is general educational information, not legal, tax, or investment advice.